History of PinholeThe Camera Obscura is a natural phenomenon and has a long history. This ‘dark chamber’ constituted the earliest form of camera, although it did not record a permanent image. In its simplest form it is a small hole (aperture) which light passes through from an object outside into a darkroom. The image appears upside down on the wall opposite the hole The first reference was observed and noted by Aristotle around 330 BC, who was perplexed why through a square hole appeared a circular image. Later in the Middle Ages, Alhazen (Ibn Al-Haytham, is said to have invented the Camera Obscura. It was later used by artists in 16th century for drawing and architecture who would trace an accurate visual reference. The camera obscura consisted of a box or room with a hole on one side in which light from an external source entered and struck a surface within the enclosure, reproducing an exact image of whatever was in view of the hole, upside down, in colour, and in linear perspective 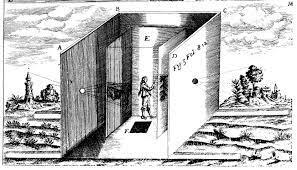 Athanasius Kircher, Camera obscura, 1646 First fixed photo image was made by Niepce (1765-1833) in 1826. He was a French amateur scientist and inventor who, in 1826, had succeeded in securing a picture of the view from his window by using a camera obscura and a pewter plate coated with bitumen. In the summer of 1826, Niépce set up a camera obscura in the window of his upper-story workroom at his country house, in Le Gras. He placed a polished pewter plate coated with bitumen of Judea ( similar to petroleum) and uncapped the lens. After at least eight hours, the plate was removed and the image of the view from the window was visible by washing with a mixture of lavender and white petroleum. The result was a permanent direct positive picture you see here—a one-of-a-kind photograph on pewter. More detailed information photo-museum.org/niepce-invention-photography 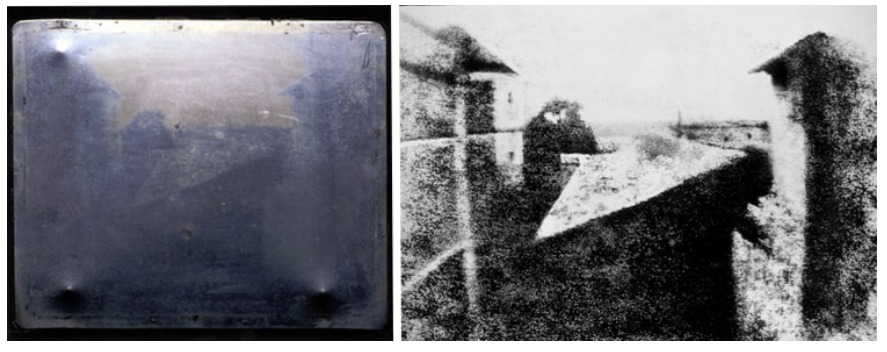 a view of the outbuildings, courtyard, trees and landscape as seen from an upstairs window Brendan Barry brendanbarry.co.uk 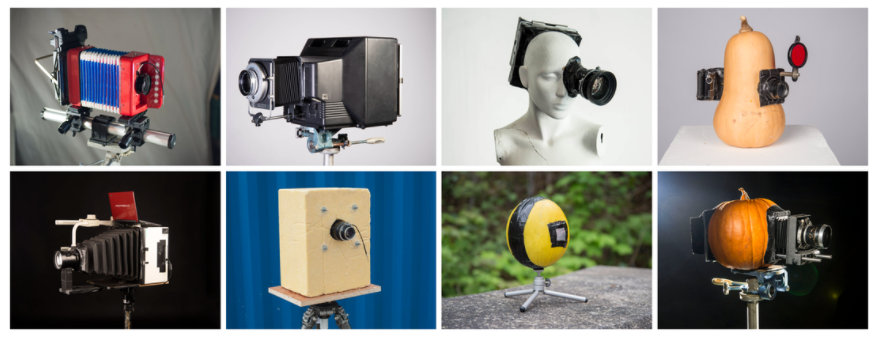 Pinhole photography is very much a back-to-the-basics experience. Constructing and using the camera will put you in touch with the physics of light and give you an understanding of the mechanics of photography. Since there is no viewfinder, you must compose the shot in your imagination by identifying with the camera, by seeing through its pinhole eye, and by using intuition, curiosity, and a healthy dose of logic. You will soon start to think and feel like the camera and the light it captures Since a pinhole camera has no lens, it offers a far greater depth of field compared with most traditional cameras, resulting in a dramatic and sometimes stunning sharpness of detail in the foreground and the background. How to make a Pinhole Box Camera Results from BoxThis self portrait was exposed for 15 secs, it was a bright sunny day in September around 4pm. I used my hand and the grass to keep as still as possible. There is a slight movement as I had to open the shutter. I could have exposed longer to have gained more detail in the arm, or moved out of the direct sun for an even exposure. However, I like the harsh shadows on the face and the slight double exposure as this later adds movement and a sense of time. Student examples There is a range of exposes in this collection, from over exposed (the black ones) and the under exposed (the white ones). further explorationsInfluenced by Barry, and by finding lots of large cardboard boxes around the college. I decided to make a large version of the box, with the help of my friend Janet. I used an old dust cap from a DSLR, drilled a hole through the plastic and then attached a brass pinhole.     Then with my trusty helper, we went out to experiment...     ResultsThis was a 30 min exposure at 4pm on 6th September 2021. it was a bright sunny day, with no cloud. The main subject is well exposed, however there is no details in the sky or foreground. Therefore I need to find a better position for the pinhole, with even lighting. But most importantly, it worked! *the burnish marks in the bottom of the paper is where the image was not developed evenly. Therefore I need to leave longer in the developer and make sure its fully submerged this was difficult as the paper was too big for the trays.   With my Level 3 students, I went out again, this time in a different location and time of day. 8th September at 10 am. This exposure was for 15 mins, I used a light meter app on my phone to record how long to expose, based on f106 and the ISO of the paper (3). It turned out to be the best of the 3 that we did that day. Not only was is sharp, it was perfectly exposed and the selection of the subject worked extremely well for a pinhole.   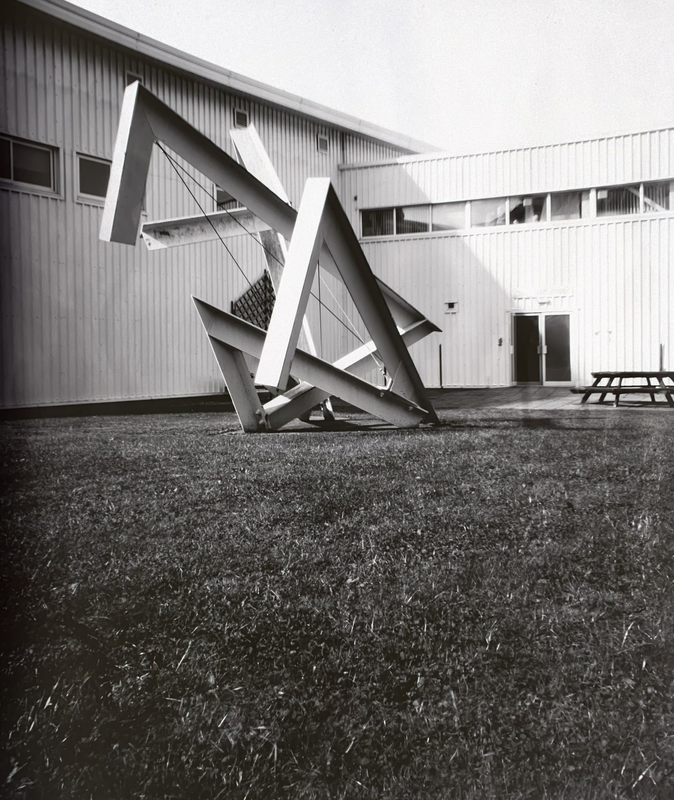
0 Comments
Leave a Reply. |
|||


